Install the SDK
Run the following command in your terminal:
- With Pages Router
- With App Router
Create a file named Create a file named On Next.js v12 and below, you’ll also need to add the following to your
instrumentation.ts in the root of your project (i.e., outside of the pages or ‘app’ directory) and add the following code:instrumentation.node.ts in the root of your project and add the following code:next.config.js:Annotate your workflows
withWorkflow() function call.We also have compatible Typescript decorators for class methods which are more convenient.Configure trace exporting
Lastly, you’ll need to configure where to export your traces.
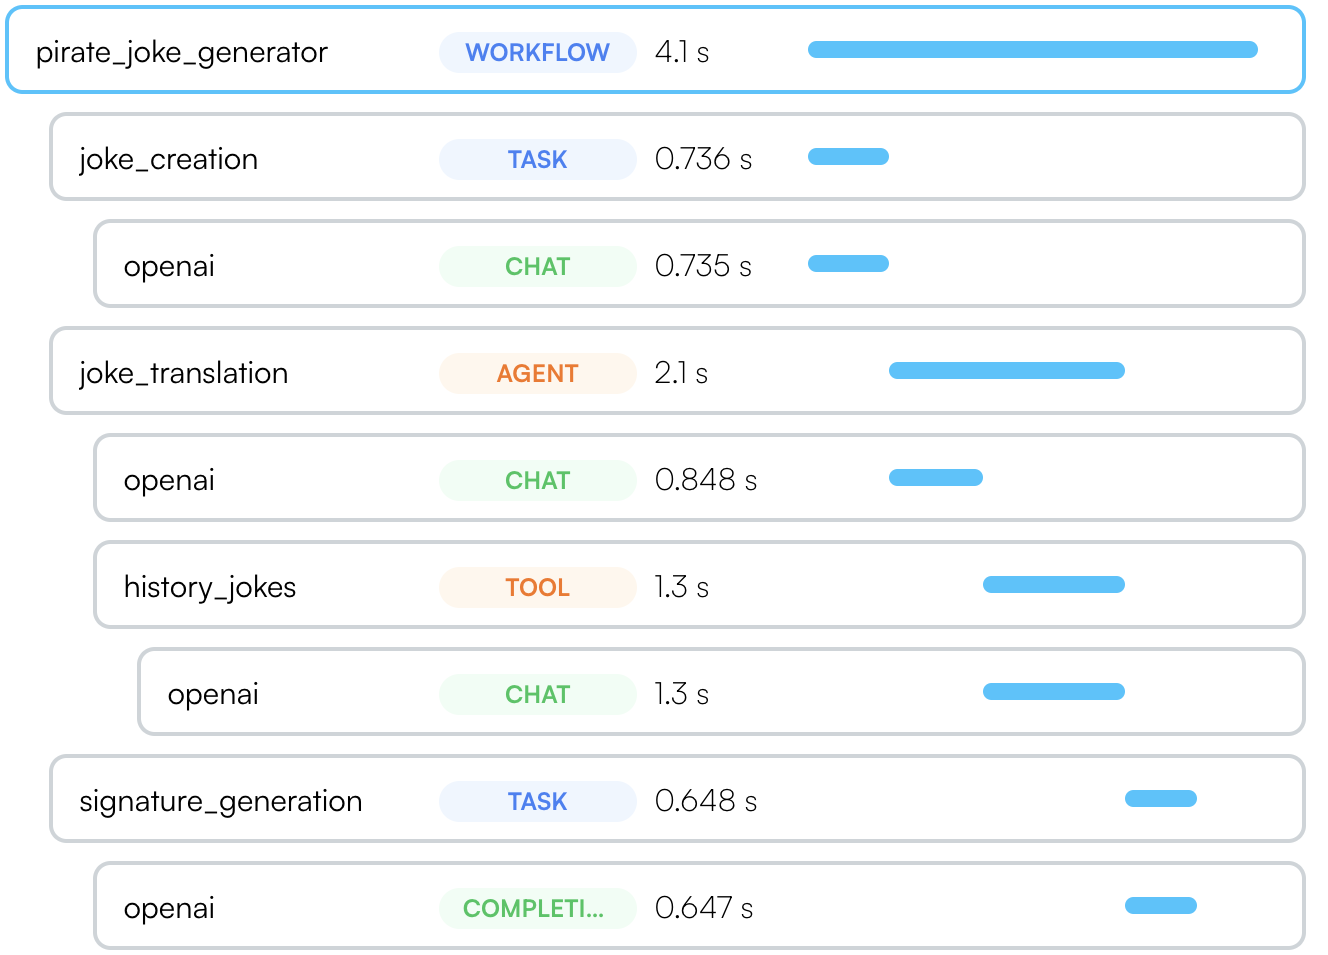
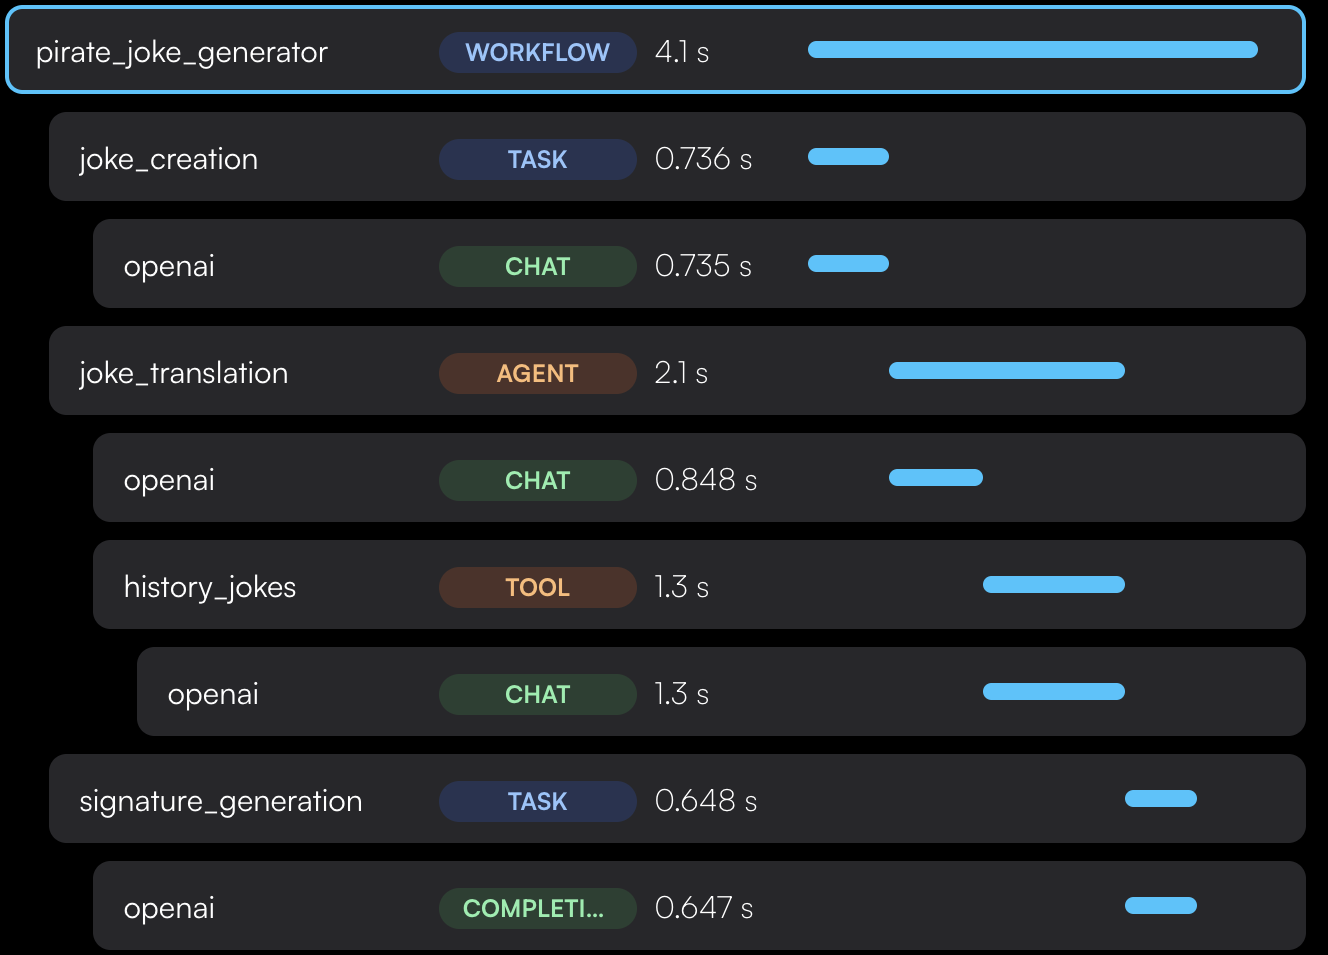
The 2 environment variables controlling this are Set the API key as an environment variable in your app named Done! You’ll get instant visibility into everything that’s happening with your LLM.
If you’re calling a vector DB, or any other external service or database, you’ll also see it in the Traceloop dashboard.
TRACELOOP_API_KEY and TRACELOOP_BASE_URL.For Traceloop, read on. For other options, see Exporting.Using Traceloop Cloud
You need an API key to send traces to Traceloop.
Generate one in Settings by selecting
a project and environment, then click Generate API key.⚠️ Important: Copy the key immediately - it won’t be shown again after you close or reload the page.Detailed instructions →
TRACELOOP_API_KEY: